.jpg)

Winter Sowing Tips for Native Plant Seedlings
- ljmarkson
- Feb 2, 2022
- 5 min read
Last spring, I meant to write a native plant seedling update to my winter sowing posts. I even made notes, but never actually wrote the post! It’s one year later so I’ll pretend I’m ahead of the game with the following tips for what to do this spring with all the little winter sown native seedlings you’ll have. For more information on winter sowing, last year I wrote two posts called Native Plants are Ideal for Winter Sowing and Native Plant Winter Sowing FAQs. There are also multiple recent native plant specific winter sowing resources including the Wild Seed Project, Joe Gardener, and the Ecological Landscape Alliance.

The following tips may need to be adjusted for other regions. I live in Atlanta where the temperatures are in the mid-60 in March when parts of the country are still shoveling snow.
Winter Sowing Tips for Native Plant Seedlings
Keep the Seeds in the Shade One of the trickiest times for winter sowing in Georgia is when the weather randomly warms up. If the seeds have started the germination process and you get a hot spell the plants may bake. One way to prevent this is to keep the winter sown pans in a shady spot while they are germinating.

Don’t Worry About Seeds Sprouting in the Winter
Air circulation can be a challenge once the weather warms and sprouts start popping up. This is not a concern for winter sprouting seedlings like firewheel (Gaillardia pulchella) or large-flowered tickseed (Coreopsis grandiflora). Native plants that sprout in the winter germinate in their own time and are designed to grow all winter long through the many cycles of fluctuating temperatures.

When and Why to Take the Tops Off
Winter sowing is just mimicking what would happen in nature in a more protected way. The seedlings are sturdier and less fragile than plants grown inside or in cold frames and do not need the kind of kid glove hardening off that vegetable seedlings do. One reason to take the tops off is because once it gets warm, circulation becomes an issue, and you don’t want mold harming the seedlings. A little bit of green moss growing in the pans might look alarming but is only algae, not mold and won't affect the seedlings. This year I’ll try to take better note of exactly when I start taking the tops off, but in general I wait until most of the seedlings have sprouted and the weather warms a bit before taking them off.
I continue to put the tops back on every night until the weather is consistently warm, and the seedlings are hitting the top when covered. The reason I would suggest putting the tops back on at night as long as possible is to keep some moisture in the pan and to protect the tiny seedlings from critters such as chipmunks and squirrels who are looking for tender shoots or want to dig for a nut they think they may have buried! The great thing about winter sowing in baking pans is the tops are designed to fit the pan which makes it easy to take them off and on. Just carefully rip off enough of the electric tape to remove the top but still be able to reattach it at night.
Once you start taking the tops off, you will need to monitor the pans more carefully and not to let the seedlings dry out since the “greenhouse” effect is not in play anymore.
With the tops off you can also start putting the sun-loving seedlings where they can get a little morning or late afternoon sun. You just don’t want them baking in the sun in the middle of the day.

Transplanting Annual or Tender Perennial Seedlings
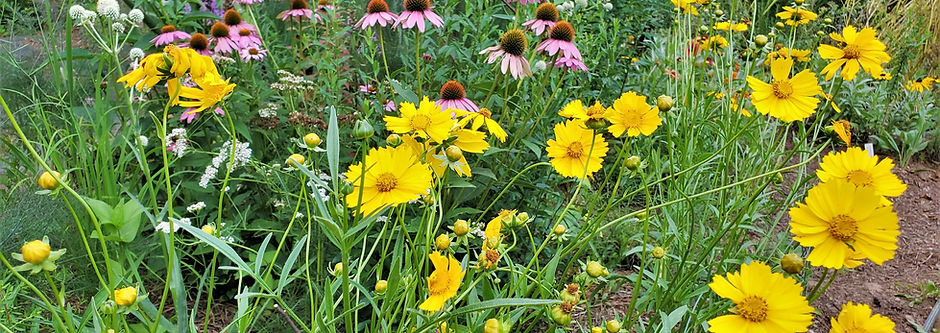
Annual and tender perennial native seedlings can be transplanted in the ground or into individual pots once they have filled out the pan. I wrote about a handful of plants to winter sow for first season blooms including Bidens alba, Golden or Plains tickseed (Coreopsis tinctoria),firewheel (gaillardia pulchella), Stone Mountain daisy (Helianthus porter), Clasping coneflower (Rudbeckia or Dracopis amplexicaulis). These are ideal native plants to grow well in planters or to grow in the ground to flower so they can self-seed the following year.

Transplanting Perennial Seedlings
Unlike annuals, native perennials can take up to three years to bloom. When the seedlings have filled out the pan and their roots are strong, healthy, and starting to reach the bottoms of the pan, the choice is whether to 1) put them into larger pots or 2) in the ground. In general, it is best to give them as much time as possible to grow with as little disruption as possible.
For seedlings that are small and close together the best way to transplant them either into pots or in the ground is to take little chunks of the sprouts and plant them. This is how the seeds would grow if a seed head fell and a bunch sprouted. The roots and shoots of the strongest survive. Larger seedlings can either be separated for transplanting or chunked out. For example, the large seedlings of Scarlet rosemallow (Hibiscus coccineus) are best if they are separated and transplanted individually but seedsbox (Ludwigia alternifolia) is best if chunked out when transplanted.

Transplanting to Larger Pots – This gives the seedlings a safe space to continue growing throughout the summer. In the fall they can be divided and planted to their final destination in the ground when the temperatures cool down again
Transplanting Directly into the Ground – The easiest way to transplant is to plant the seedlings where you want them to mature. If the seedlings are small though, they need to be in a more protected, partially sunny area where they won’t be crowded out by bigger plants and disappear by the end of the season. In Georgia they also need to be planted where the hot afternoon sun won’t burn them up. This means they may need to be transplanted again to their ideal spot in the fall. I’m guilty of being anxious to get all my seedlings in the ground then not being particularly attentive and losing many of them once the rough and tumble growing season gets in full swing. This year I’m going to try being a bit more patient and let more of my seedlings spend their summer in bigger pots to see if I can have a better long term success rate.

Seedlings with a tap root, like pasture thistle (cirsium discolor), rattlesnake master (Eryngium yuccifolium), or Evening primrose (Oenothera biennis) are better planted where they will remain because they do not transplant well.
Native plant winter sown seedlings are meant to survive where you live. They're hardy! No matter where or how you transplant them, one of the few ways you will need to support them is to keep them watered throughout the growing season. Otherwise, they're ready to grow!

Note - there are never affiliate links in my blog. Click the highlighted text throughout the posts for links to references, explanations or examples that might be interesting or helpful.